Kinect. It is needed to begin with something...
Kinect or Prime Sensor: what is it and how it should be used? This question is appropriate if you did not see numerous videos in Internet with the use of these devices... Therefore, we should begin with information searching about Kinect, if these words are not known for you ... It is although possible to search for nothing, and to read my super informing determination of this device: Kinect - it is a cool device...
Now when we know what is Kinect, I suggest to find out step by step how it works. It will be needed some time to connect it to openwrt. Time to look into software.
First I suggest to start to start using/testing Kinect under Linux, and then maybe we will reach Kinect adaptation under openwrt.
Let's begin...
Let's download the drivers providing hardware support of camera and sensing units of Kinect. As far as I understand there are two variants of drivers: it is a project OpenNi and a project libfreenect. I suggest to try to build the project OpenNi.
Let's download:
git clone https://github.com/OpenNI/OpenNI.git |
There are two ways of building of this project. The first one is to run the script: OpenNI/Platform/Linux - x86/CreateRedist/RedistMaker. The second is more usual for us: to run "make". I suggest to go the second way.
Let's go to the directory of OpenNI/Platform/Linux - x86/Build and let "make" run. It will be displayed approximately the following:
|
If the building is successfully over we run the following:
OpenNI/Platform/Linux-x86/Build$ sudo make install |
The drivers of the project OpenNi support apparently only PrimeSensor. For supporting of Kinect there is «fork from PrimeSense to support the Kinect» named boilerbots https://github.com/boilerbots.
Let's download the boilerbots:
git clone https://github.com/boilerbots/Sensor.git |
Now we go to the branch of Kinect, build and install:
Sensor$ git checkout kinect Branch kinect set up to track remote branch kinect from origin. Switched to a new branch 'kinect' Sensor/Platform/Linux-x86/Build$ make Sensor/Platform/Linux-x86/Build$ sudo make install |
Further we download the latest version of the OpenNi Middleware Binaries from
We should also pay attention to the free key on this page:
0KOIk2JeIBYClPWVnMoRKn5cdY4=
Let's pack out and go to the directory Nite/Data. There are 3 xml-files there. The free key is to be inserted instead of the line «insert key here» in these files. It should be displayed as the following:
<OpenNI>
        <Licenses>
                <License vendor="PrimeSense" key="0KOIk2JeIBYClPWVnMoRKn5cdY4="/>
        </Licenses>
Further we run script “install.sh” and enter the key again by request:
|
Let’s connect Kinect and check the output dmesg:
usb 1-3: new high speed USB device using ehci_hcd and address 5 hub 1-3:1.0: USB hub found hub 1-3:1.0: 3 ports detected usb 1-3.2: new full speed USB device using ehci_hcd and address 6 usb 1-3.1: new high speed USB device using ehci_hcd and address 7 usb 1-3.3: new high speed USB device using ehci_hcd and address 8 |
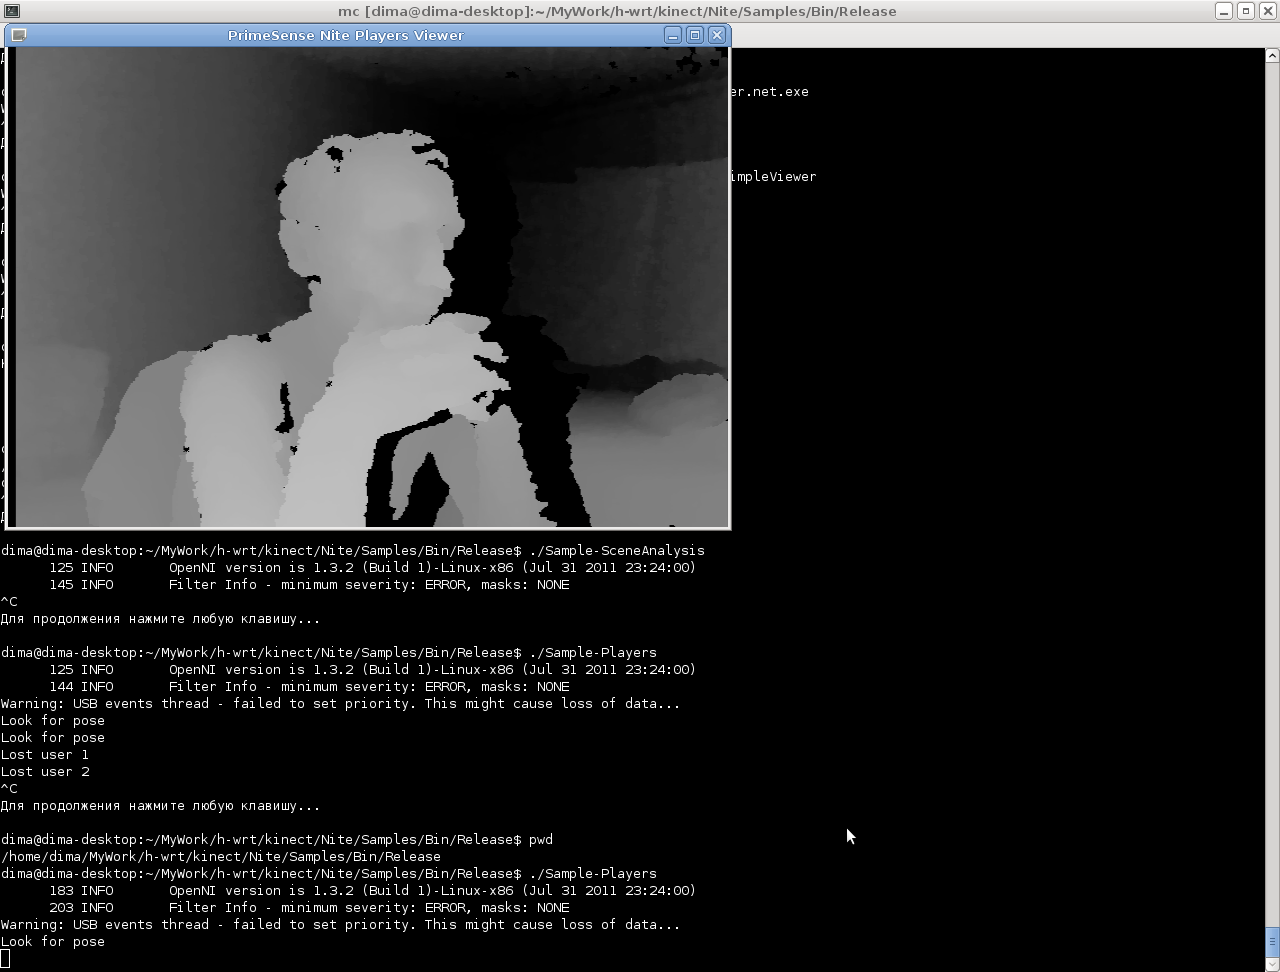
Now we can go to the directory OpenNI/Platform/Linux-x86/Bin/Release or to the directory Nite/Samples/Bin/Release and run the working examples.
The working example of the program /Nite/Samples/Bin/Release$ Sample-Players
We have finished with the project OpenNi. Of course it doesn’t mean that we understand everything now but we got the working examples and their source codes at least. Therefore it will be easier to make next steps...
To understand the difference between the projects OpenNi and «OpenKinect project- libfreenect» I suggest building of the project libfreenect.
Here is the page of the project libfreenect: http://openkinect.org/wiki/Main_Page
Here is the page with the description of the building process:
http://openkinect.org/wiki/Getting_Started
Let’s download the source codes:
git clone https://github.com/OpenKinect/libfreenect.git |
Let’s create the directory build, go to this directory and run “ccmake”:
$ cd libfreenect $ mkdir build $ cd build $ ccmake .. |
The editor window will appear. Let’s press «с» for configuring. It will be searched for the installed libraries. It should be noticed that the fields look approx. like this:
|
Let’s press «g» for file generating and exit.
Let's make the building:
$ cmake .. $ make $ sudo make install |
The working examples are here: kinect/libfreenect/build/bin.
Let's summarize... I think we had a good job with the "first smaaaal step of learning Kinect». Further it will be easier and more difficult simultaneously))... On the whole, the possibilities of Kinect are very impressive,one would find spare time now to try to connect it to some piece of iron... to our favourite router with openwrt)))
Buy Kinect from us: